

This is a digitized and translated version of the instruction manual for Bahamut Senki (Record of the Bahamut War). See also the supplementary character catalog. Translation by TheMajinZenki; digital conversion by Supper. Based on scans provided by Sega Retro; the originals can be found on their Bahamut Senki page.
Thank you for buying "Record of the Bahamut War" for the Sega Mega Drive. Before playing the game, we recommend reading this manual and the supplementary character catalog to enhance your experience.
Chosen Ones, welcome to Bahamut, a world of illusions and magic.
I have ruled over the history of Bahamut since the most ancient of times.
You have been chosen among many to become the undisputed conqueror of this continent.
Through your own deeds, you will be writing the history of Bahamut.
You will go through countless battlefields, until the day you are crowned with the laurels of victory...
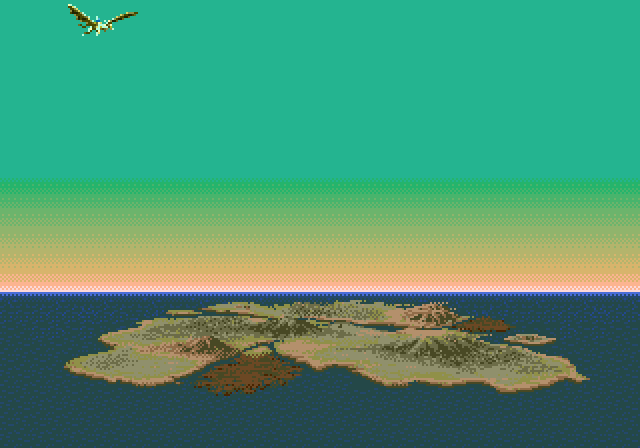
Once, long ago, the continent of Bahamut teemed with grotesque creatures which lived without law or order.
It came to pass that one particular group of evil creatures, capable of terrible dark powers, was born: the Demon race, led by Devil King Klimt. For a long age, these Demons ruled over the continent, killing any who would defy them. But as time went by, such cruelty could no longer be tolerated. While Klimt was busy dealing with the Great Dragon Velfraim and her kin, the heretofore suppressed power of Good began spreading among the Human race.
The leader of the Humans was the founder of the Pholia royal line, later to bring an age of peace and stability to the continent. In order to defeat Devil King Klimt, the root of all evil, the Humans formed the Order of the Holy Knights, trained in the use of Earth Spirit magic, to counter the Demonic Dark magic.
After finishing off Velfraim and the Dragons, Klimt got wind of the Humans' plan and immediately sent his entire army to crush them. Two great heroes valiantly led the Holy Knights against the unending army of Demons: Sir Raymond, the greatest wizard, and Sir Balmer, the strongest swordsman.
After countless battles, and too much bloodshed, the tides of war turned against the Human side. Defeat became a likely outcome. And so Raymond and Balmer made a grave decision: to unseal the magic sword Betharusnega, a sword feared since ancient times. Its blade was pure, crystallized dark power, capable of absorbing the essence of its opponent with a single strike—at the cost of the wielder's life. Sir Raymond himself had sealed it deep beneath the land using the strongest white magic he was capable of. However, it was the only option left to defeat Klimt. Raymond was opposed to this plan, but in the end was persuaded by Balmer, who, wielding Betharusnega, personally challenged Klimt to mortal combat.
After a fierce, valiant battle, Klimt was finally defeated. However, Sir Balmer's own life was taken by the demonic blade's dark power.
Time passed. In the wake of Klimt's defeat, Pholia's Holy Knights kept the peace of the continent for the following 2,000 years.
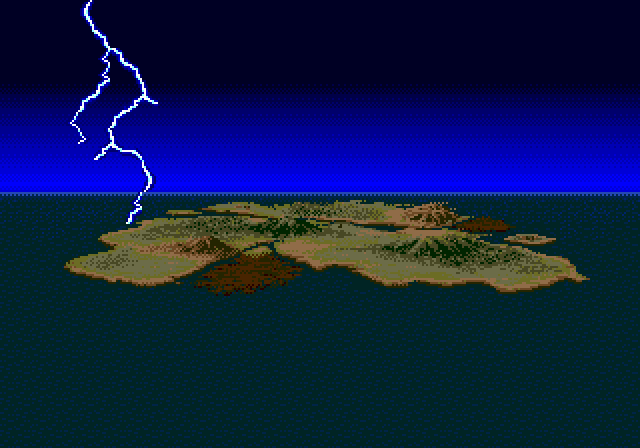
And then the shadow of darkness threatened Bahamut once more. A group of wizards, in defiance of the laws set by the Pholia royal line, sought the power of darkness and researched the forbidden Dark magic. Though they were promptly and harshly suppressed by the Holy Knights, the damage was already done: the authority of the King had been irremediably challenged. With the power of Good in decline, the balance of Good and Evil was broken. Dark power was returning to Bahamut once more.
The continent was torn by a series of natural disasters. Both the people and the land itself suffered. So began the "Age of Darkness". Amidst the chaos, several who should have been long vanquished made their return.
In the eastern marshes, Klimt; in the northeastern volcanoes, Velfraim; even Gailum, the King of the Giants, whom the Pholian Holy Knights had once sealed underground, emerged once more. But most shocking was the return of Sir Balmer. That hero should have been at his eternal rest beneath Castle Pholia, but now he was brought back‐as the undead, the symbol of the dreaded "Age of Darkness". His existence completely crushed the authority of the Pholian royal line. The continent no longer had a leading figure.
The only way to bring an end to this new era of turmoil would be for one of them to stand above all, as the new undisputed ruler of Bahamut...
"Record of the Bahamut War" is a fantasy strategy game for 1 to 4 players. With its three sets of rules and four scenarios, it can be enjoyed by beginners and experts alike.
You play as a Master, the ruler of a nation, leading an army of knights, wizards and monsters in a series of battles to conquer the continent.
Your ultimate goal is to defeat every other Master, and become the undisputed ruler of Bahamut!
Before starting to play, make sure your Control Pads are properly attached to the Mega Drive.
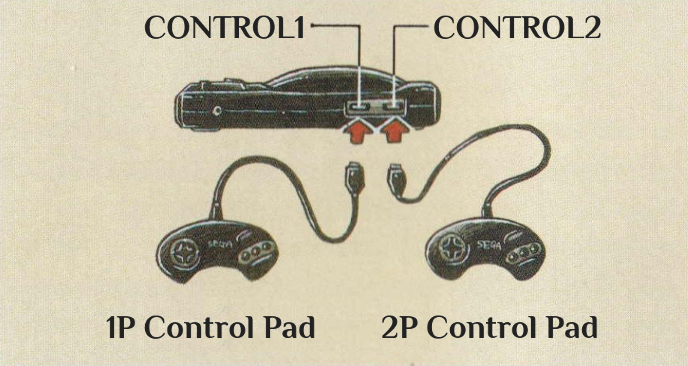
You will need two Control Pads to play this game with two or more players. (You may need to buy an additional Control Pad.)
Please refer to the CONTROLLER entry in the OPTIONS menu when using a second Control Pad.
While the functions may change depending on the screen, the basic use of the Control Pad is as follows:
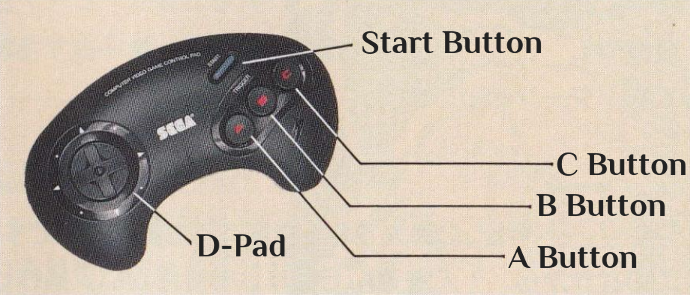
"Record of the Bahamut War" uses certain terms that not everyone may be familiar with. We suggest reading the following before playing the game, or referencing it as needed.
A "Turn" is the time a Master will be in control, choosing policies, executing strategies, and more.
A "Master" is one of the eight playable rulers. The player(s) each pick one of them, and the rest are controlled by the computer. If your Master is killed, the game is over.
An "Area" is one of the 40 territories in the Bahamut continent. Each area has its own name (Bahamut Map).
"LP" stands for "Land Points". Every Master gains LP every Turn depending on the number of areas they have conquered. LP are used to conscript Squadrons.
"SP" stands for "Summon Points". SP are acquired by winning battles, depending on the number of enemies defeated. SP are used to summon Squadrons.
This term refers to the troops controlled by each Master.
There are more than 50 different types of Squadrons in this game, like knights, wizards, and monsters. Some of them can be conscripted, while others can be summoned. Up to 12 Squadrons can be placed in a single area.
The health of a Squadron. The Squadron is annihilated if it drops to 0.
Squadrons capable of casting spells require MP to do so. If it drops to 0, they can no longer cast spells.
This refers to the six-sided tiles that compose the Tactical map. You can position and move your Squadrons over these "Hexes".
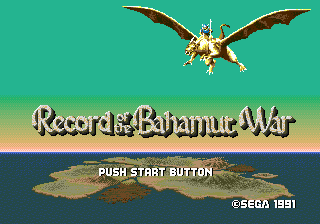
Press the Start Button at the Title Screen, and the screen will change as follows. A quill pen cursor will appear, allowing you to choose one of the menu entries.
Choose this entry if you wish to start a new game.
If you have saved your game progress, choose this entry to continue your game. Select one of the numbered files, and press the C Button to confirm.
Choose this entry to change various game options (see Options Screen).
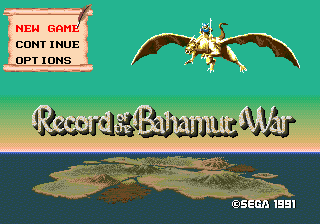
Now, let us start playing. Once you start a new game, you will be asked to select your preferred game content. First, select NEW GAME as shown in the previous screenshot.
You have to choose a set of rules when you start a game. These rule sets determine how easy or complex the game will be.
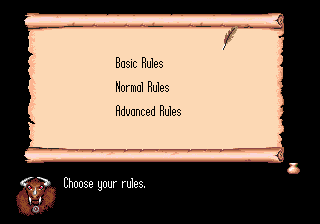
For beginners. This set makes the game relatively easy to play.
The Basic Rules are as follows:
For experienced players. The game experience will be improved over the Basic Rules.
The Normal Rules are as follows:
For hardcore players. Choose this if you really like a challenge.
The Advanced Rules are as follows:
The various scenarios change the number of Masters present and the number of Areas they start with.
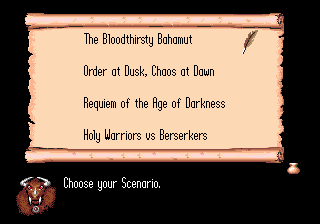
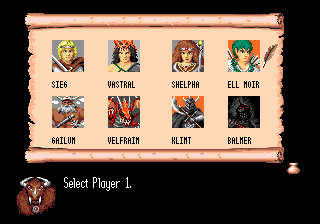
There are eight Masters available: Sieg, Vastral, Shelpha, Ell Moir, Gailum, Velfraim, Klimt, and Balmer. (If using the Basic Rules, Balmer is excluded.)
Each Master starts with one Area.
There are seven Masters available: Sieg, Vastral, Shelpha, Ell Moir, Gailum, Velfraim, and Klimt.
Each Master starts with multiple Areas.
There are three Masters available: Sieg, Vastral, and Klimt.
Each Master starts with multiple Areas.
There are two Masters available: Sieg and Vastral.
Each Master starts with multiple Areas.
This scenario is ideal for practicing the game.
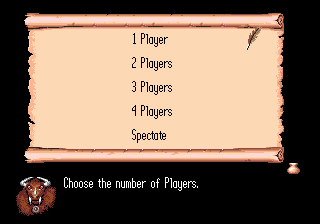
You may also choose to spectate, but be aware that you won't be able to join the game in progress. (See Spectator Screen.)
The Master changes the type of Squadrons you will be able to lead. Keep in mind that you may not select Balmer if you've chosen the Basic Rules.
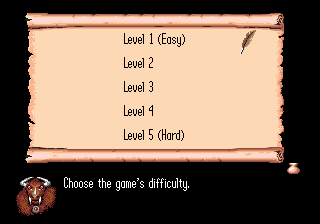
The difficulty level ranges between 1 and 5, influencing Events and the strength of the Neutral Areas. The higher the level, the more enemy units will be deployed in the Battle Screen (up to five Squadrons).
To change a setting, highlight it and press the A or C Button. Once you are done, press the B Button.
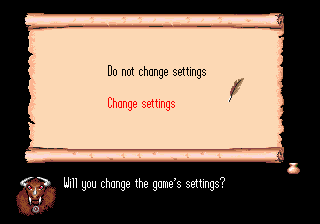
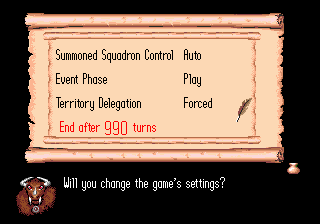
The game is finally about to begin. Press the C Button to start.
There are three types of Game Screens: the Strategy Screen, the Tactical Screen, and the Battle Screen. This game is normally played in the Strategy Screen; if a battle occurs, you will move on to the Tactical Screen, and then to the Battle Screen.
The Strategy Screen is the main screen of the game, displaying the entire map of the continent. Most of the game's progress will happen on this screen.
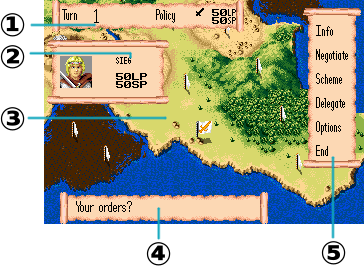
① Current Turn and remaining LP/SP
② Master name
③ Strategy map
④ Messages
⑤ Commands window
This is the typical flow of the game:
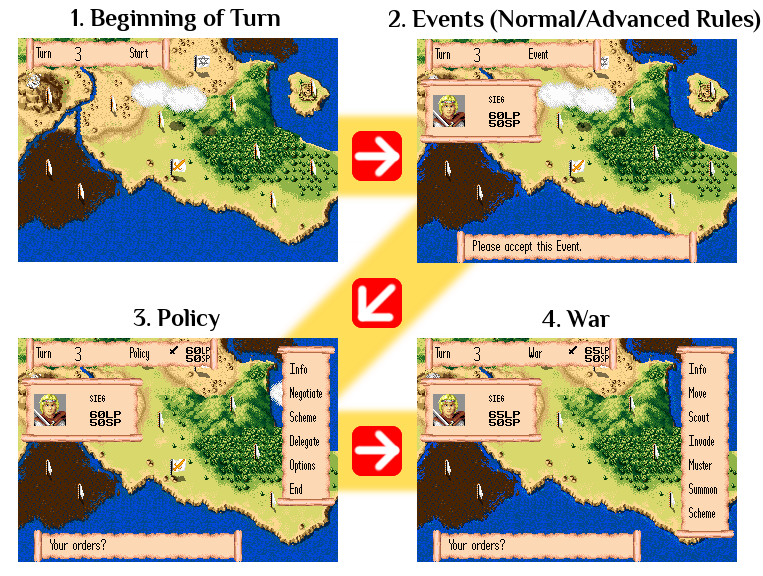
At the beginning of each Turn, your Squadrons will recover their HP and MP. However, Squadrons without regenerating abilities will only recover 1/4 of their max HP. At this point, an Event may randomly occur.
When playing under Advanced Rules or in modified Normal Rules, an Event will occur at the beginning of every Master's Turn, starting from Turn 3. There are two types of events: Accident Events that will occur automatically, and Scheme Events that may be used as Schemes at a later time. Press the C Button to receive the Scheme Event. Only three Scheme Events may be held at a time. (You will need to discard one in the event that you receive another.)
☆ Please refer to the supplementary catalog for a list of Events.
This is where you attempt diplomacy or try to sabotage an enemy Master. Once you complete the Policy phase, you will receive LP based on the number of Areas in your possession.
In this phase, you will give orders to every Area under your control. Note that you cannot give orders to Areas without Squadrons in them, or to Areas under Delegation.
On the Policy/War screen, press any button on the Control Pad to display the quill pen in the Commands window.
The Commands are how you can directly control your domain. Select the Command you wish to execute and press the C Button to confirm.
☆ For details, please refer to the list of Commands.
The Tactical Screen is the screen you'll see when you go to war. This will happen during the "War" phase when you choose to invade a Neutral or Enemy Area, or when you are attacked by the enemy or by monsters. There are different versions of the Tactical Screen: a Simple version for beginners, and the more realistic Hex version.
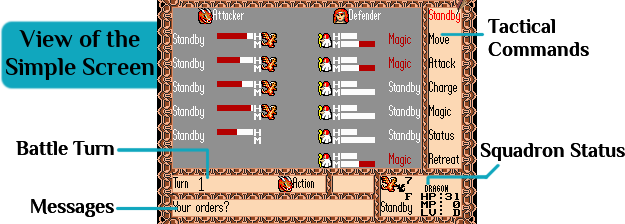
You can take command of the battle yourself, or let the computer handle it. If you choose to take command, you will select the Tactical Command to use and then give orders to your Squadrons. Keep in mind, however, that if you're playing under Advanced Rules, you will not be able to command your Squadrons without the Master or a Hero present on the battlefield.
☆ Please refer here for information regarding the Tactical Commands.
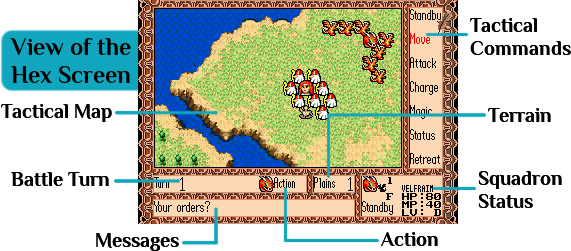

① First, you must select whether to take command of the battle or let the computer handle it. (Keep in mind that you can only assume control if your Master or a Hero is present on the battlefield.)
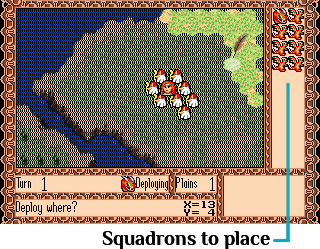
② If you choose to take command, you will have to position your Squadrons on the Tactical Map. First, select a Squadron, then move the quill pen over one of the highlighted tiles of the map. Finally, press the C Button to place the Squadron. If you wish to change the position of the Squadron, press the B Button. If you are satisfied, press the C Button.
③ If you possess any Scheme Events usable in battle, you will be able to activate them now. Press the B Button to cancel, or press the C Button to confirm; select the Scheme Event to use, and press the C Button to activate it.
☆ Please refer to the supplementary catalog for information regarding Schemes.
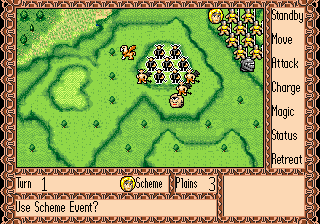
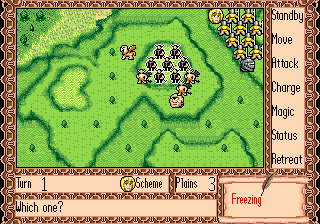
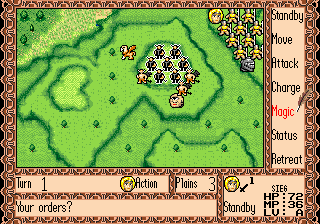
④ Use the Tactical Commands to give orders to your Squadrons.
☆ Please refer here for more information regarding Tactical Commands.
The Battle Screen is the action part of the game, where opposing Squadrons face each other in real time. It will be triggered automatically when a Master or Hero you're controlling initiates combat with the enemy on the Tactical Screen, either by attacking normally or by Charging. Please note that the Battle Screen can be deactivated (refer to Commands: "Options").
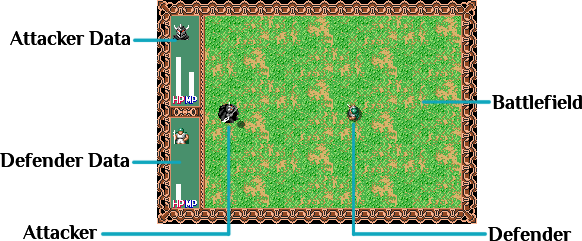
If you selected Attack, the battle will only last 30 seconds; if you selected Charge, it will continue until one of the sides has been defeated.
Use the Control Pad to control your Master or Hero's Squadron. If your opponent is also a player, you will not move to Battle Screen unless the 2P Control Pad is connected. When both pads are connected, the Attacker uses the 1P Pad while the defender uses the 2P Pad.
The A Button will use the sword, while the B Button will use either the spear or magic. To swap between spear and magic, press the C Button to open the window, then press the A Button to change "Normal Attack" to "Magic Attack". There are four magic levels; press the A Button to change the level.
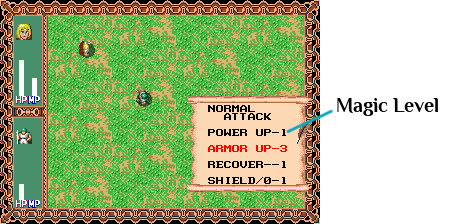
☆ The higher the magic level, the stronger the spell.
| Master | A Button | B Button | Magic Level | |
|---|---|---|---|---|
| Sieg | Sword | Spear/Magic | 4 | |
| Vastral | Axe | None | None | |
| Shelpha | Staff | Magic | 4 | |
| Ell Moir | Bow | Magic | 3 | |
| Gailum | Flail | Boulder | None | |
| Velfraim | Bite/Claws | Breath/Magic | 3 | |
| Klimt | Axe | Magic | 4 | |
| Balmer | Sword | Magic | 4 | |
☆ Please refer to the supplementary catalog for information regarding the Battle Screen spells.
When you choose to spectate, you won't be able to join the game while it's progressing. The game will advance exclusively in the Strategy Screen.
However, while Sieg is alive, you can bring up the Policy commands for Sieg's Army during the "Policy" phase by pressing the Start Button.
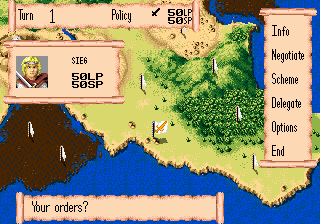
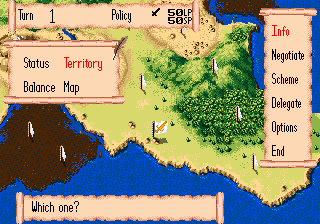
You will only be able to access the Info and Options commands, allowing you to check the strength of each Master, as well as save the game.
The controls are the same as the normal "Policy" controls; however, you will be able to see information on Areas not controlled by Sieg, regardless of the rules.
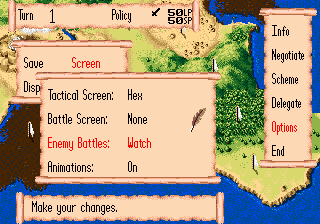
Additionally, if you turn on the "Watch Enemy Battles" option, you will also switch to the Tactical Screen during combat.
If Sieg dies, or if you turn off the "Carry out Policy" option, you will no longer be able to intervene in the game.
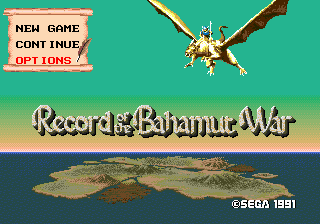
Once you start the game, the screen will appear as shown on the right. Highlight OPTIONS and press the C Button; the screen will change as shown below.
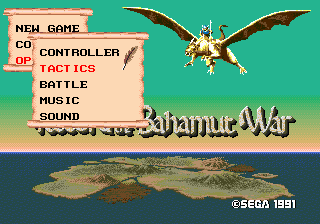
Highlight your preferred entry and press the C Button to confirm.
Use the D-Pad to choose between 1 Pad or 2 Pads. Press the B Button to make the selection automatically. (The automatic selection is based on the number of Pads connected to the console.)
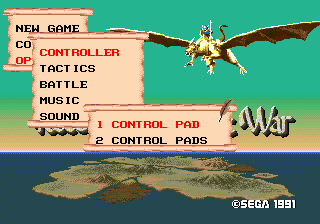
You will control the game using only one Pad. (You will require two Pads if you wish to fight another player-controlled Master or Hero in the Battle Screen.)
The game will be controlled mostly with one Pad, with the other Pad used when you enter combat with another player-controlled Master or Hero. The attacker will use the 1P Pad, while the defender will use the 2P Pad.
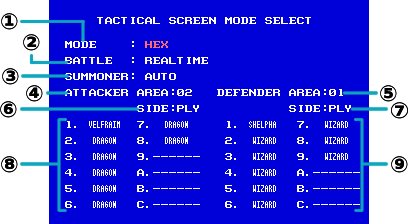
Use the D-Pad to highlight an entry, then press the A or C Button to change it. When changing the Squadron settings, press the B Button to nullify a Squadron, and press it again to bring it back. Once you are satisfied with your selection, press the Start Button to move on to the Tactical Screen.
The left side is the Attacker; the right side is the Defender.
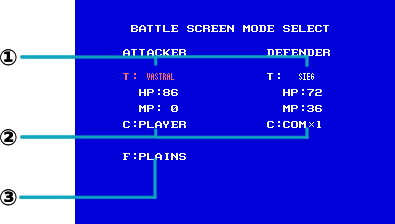
Use the D-Pad to highlight an entry, then press the A or C Button to change it. Once you are satisfied with your selection, press the Start Button to move on to the Battle Screen.
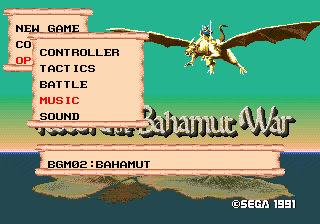
Here, you can listen to the game's BGM tracks.
Press Up or Down on the D-Pad to change the track, then press the C Button to play it.
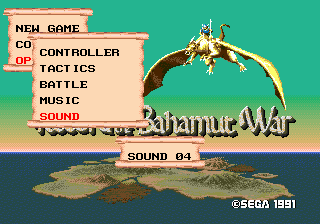
Here, you can listen to the game's sound effects.
Press Up or Down on the D-Pad to change the number, then press the C Button to play it.
This game features a large variety of Commands. We recommend referencing the manual whenever you need to know more about any specific Command.
The following are the Commands usable during the Policy phase. Highlight your choice and press the C Button to confirm. If you have chosen to play as either Sieg or Vastral, your tactician will give you advice if you press the A Button after selecting the Negotiate or Scheme Commands.
This Command will allow you to confirm the condition of your forces, focusing on the Area where your Master is located. The Info Command contains four Sub-Commands. Highlight your selection and press the C Button to confirm.
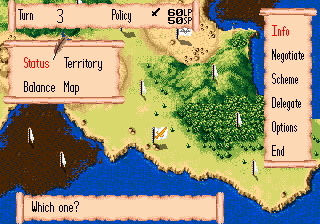
This will display the status of the Area under your control, as well as your Squadrons. Pressing the A Button will display the amount of experience needed to Rank-Up each Squadron.
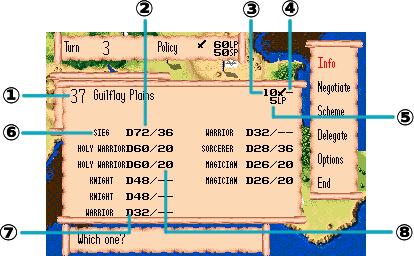
Squadrons gain experience by defeating enemies and training. With enough experience, Squadrons can Rank-Up. Once a Mustered Squadron reaches Rank A, it will grow to the next Class.
Warrior → Knight → Holy Warrior
This Command will allow you to check the status of all the Areas under your control (under Basic Rules, every Area, with no restrictions).
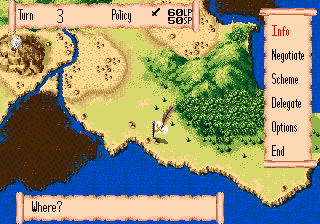
Move the quill pen over the flag of the Area you wish to check and press the C Button to confirm.
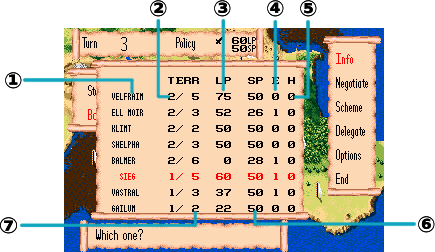
This Command will display the status of all surviving Masters, in order of power.
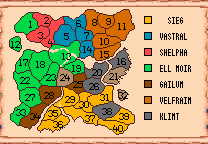
This Command will show the entire map of the continent, with different colors displaying the power balance of each Master. Press the A Button to display the number of each Area; press it again to display their Delegation statuses. Pressing the C Button will display existing Alliances.
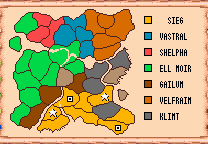
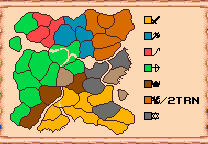
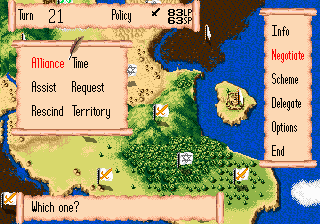
This Command will allow you to enter negotiations with other Masters. Keep in mind, however, that Balmer cannot use Negotiate. This Command contains multiple Sub-Commands. Highlight your selection and press the C Button to confirm.
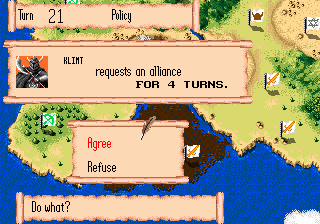
Promise not to invade one another.
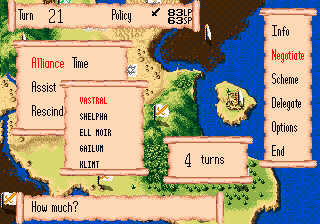
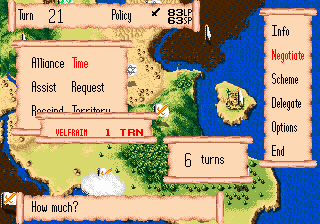
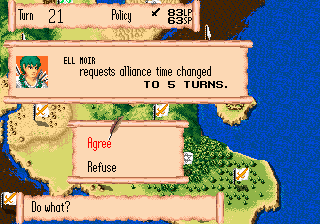
Extend or shorten the duration of your Alliance.
Unilaterally assist one of your allies by sharing your LP with them.
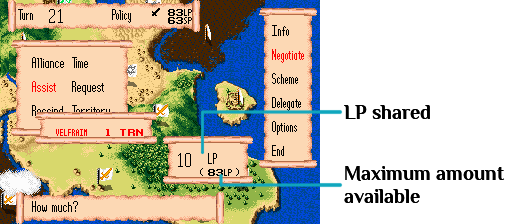
Request LP from one of your allies.
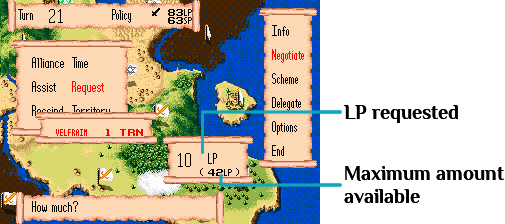
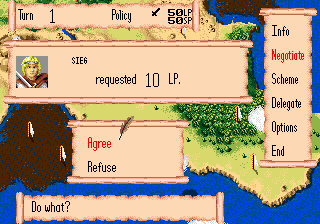
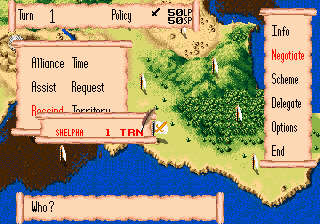
Unilaterally rescind an Alliance. However, financing this maneuver requires 15 LP for each Turn remaining in the Alliance. (The Rescind command will not be available if you have less than 15 LP.)

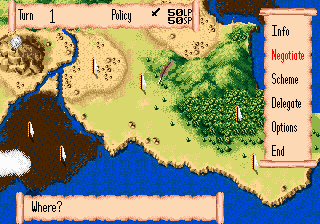
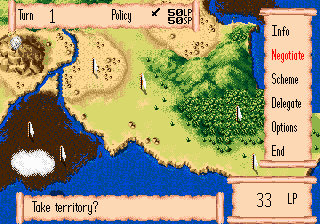
This Command will allow you to obtain control of a neighboring Neutral Area by paying a certain amount of LP.
This Command will allow you to use Policy-specific Scheme Events acquired during "Events" (under Advanced Rules or modified Normal Rules).
Press the C Button to bring up the usable Scheme Events in your possession.
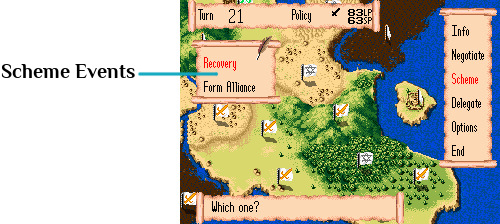
Select the Scheme Event you wish to use, then press the C Button to confirm and activate the Scheme.
There are many types of Scheme Events. The situations in which they can be used depend on their type.
Usable during "Policy" phase.
Raging Storm, Crystal Ball
Usable during "War" phase.
Clairvoyance, Surprise Attack
Usable during combat in the Tactical Screen.
Heavy Fog, Freezing
Usable when invaded by the enemy.
Forced Retreat
Some Scheme Events can be used in multiple situations.
☆ Please refer to the supplementary catalog for information regarding Schemes.
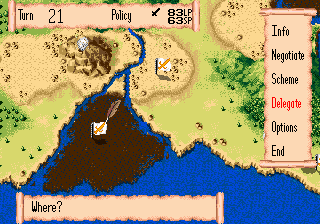
This Command will allow you to entrust the computer with the management of a specific Area. However, you cannot Delegate the Area where the Master is currently located.
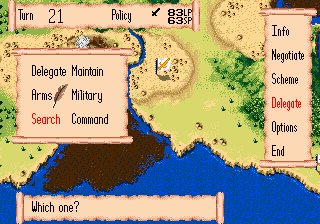
| Delegate | Entrust the computer with everything. Under Advanced Rules, the Forced Delegation setting is active, automatically activating Delegation in every Area without a Master or a Hero. | |
| Maintain | Fundamentally do nothing except maintain the current situation. Training will be performed as needed. | |
| Arms | Muster/Summon/Train Squadrons. | |
| Military | Muster/Summon/Train Squadrons, and Invade when necessary. | |
| Search | Focus exclusively on searching for Heroes. Be aware that this cannot be done if there are no Mustered Squadrons present. Masters who cannot hire Heroes cannot use this Sub-Command (please refer to the supplementary catalog). | |
| Command | Cancel Delegation and take control. Keep in mind that under Advanced Rules, you cannot control an Area without a Hero. |
When a Hero is found, you will be shown a notification with their name and the LP required to hire them. Press the C Button to hire them, or press the B Button to ignore them. Regardless of your choice, the search will resume in the same Area.
You can check the Delegation Status of your Areas from the "Info" Sub-Command "Map".
The following Sub-Commands will allow you to modify the game's settings or save your progress. Select a Sub-Command and press the C Button to confirm.
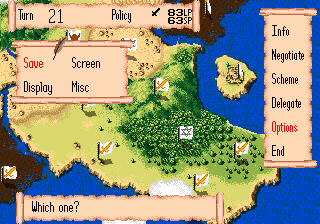
This will allow you to save your progress. Once selected, the screen will change as in the following picture. Select a file and press the C Button to confirm.
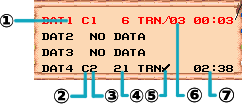
This is where you can alter settings related to the game screens. Select the entry you wish to modify and press the C Button.

Here, you can alter messages' speed, their duration, and the movement speed of the quill pen cursor. Highlight an entry and press the C Button to change it. The higher the number, the slower the speed.


Here, you can select whether to carry out the "Policy" phase, as well as whether training and saving should be performed automatically. Highlight an entry and press the C Button to confirm.
When set to be automatic, training and saving will be performed after selecting the End Command. The game will be saved on File 4.
Ends the Policy phase and moves on to the next phase.
Compared to the Basic Rules, there are additional Commands available during the "War" phase when playing under Normal or Advanced Rules. Furthermore, if you have selected Sieg or Vastral as your Master, you will receive advice from your tactician by pressing the A Button on any Command other than Info, Delegate, Options and End.
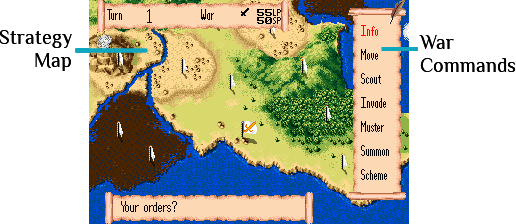
While its functionality is about the same as the "Info" Command of the Policy phase, during this phase, the focus will be on the Area you are currently controlling. This Command will let you confirm the status of your forces, the enemy's forces, and Neutral Areas. (Under Normal Rules or above, you will need to Scout first.)
Info contains four Sub-Commands. Make your selection and press the C Button to confirm.
☆ For more details on the Sub-Commands, please refer to the Policy Command "Info".
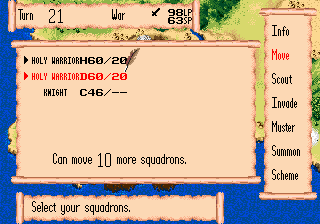
Once a Squadron has moved, it won't be able to act again until the following Turn.
This Command will allow you to attack a neighboring enemy or Neutral Area. Under normal conditions, this will initiate combat with the enemy Squadrons or Monsters present in that Area, and the game will switch to the Tactical Screen.
① Move the quill pen over the Area you wish to Invade.
Under Basic Rules, pressing the A Button will bring up the status of the enemy Squadrons present in the Area. (Under Normal Rules or above, you will need to Scout the Area first.)
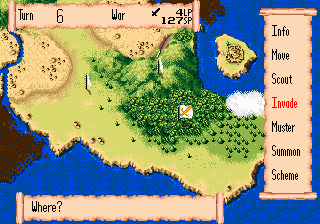
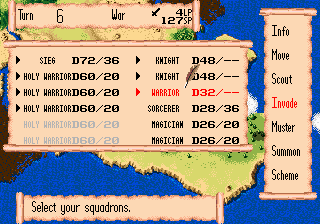
② Press the C Button to bring up your Squadrons. Select the Squadrons that will join the battle, press the A Button to give orders, and press the C Button to confirm.
③ After a confirmation message, press the C Button to initiate the invasion, switching to the Tactical Screen.
If the enemy invades one of your Areas, and there are no Squadrons protecting it, you will lose that Area immediately.
If there are Squadrons protecting your Area, you will be shown the affiliation of the enemy, their total count, and the name of their main Squadron. You will be forced to choose one of the four available options: Fight, Scheme, Retreat, or Yield.
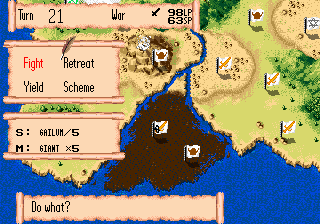
If you have any Scheme Events usable when the enemy invades you, you will be able to use them from the Scheme option at this time.
If you choose to Yield, you will lose all of your Squadrons and the enemy will capture that Area.
You cannot choose to Retreat if there are no Areas to retreat to.
If you choose to Fight, you will switch to the Tactical Screen. If the enemy invades a Delegated Area, and you have set the "Watch Enemy Battles" option to "No", the battle will be automatically settled in the Strategy Screen (for more details, please refer to the Options Sub-Command "Screen").
The original manual does not mention this, but since it can be very confusing, the translation team would like to make a point of it: if the game has been configured to use the "2 CONTROL PADS" option on the title screen menu, which is the default when it detects that two Pads are plugged in, you must use the Player 2 Control Pad to control this menu, even in a one-player game. In most cases, the Player 1 Control Pad will not respond to input, making it seem as if the game has "frozen".
The logic here seems to be a carryover from the multiplayer mode: since up to four players are supported but a standard Mega Drive has only two controllers, the game expects that Controller 1 will be passed around to each player as they take their turn, with a player who gets invaded picking up the unoccupied controller. Why this remains the case in single-player mode, we can't tell you.
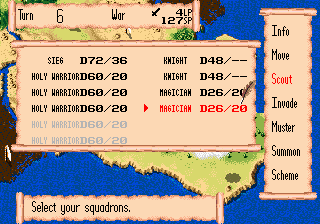
This Command will allow you to add additional Squadrons in your Areas by spending LP. Only Squadrons can Muster other Squadrons. You can assign one or two Squadrons per Area to this task. Both the new Squadron and the Squadrons executing your order won't be able to act again until the next Turn. Balmer cannot use this Command.
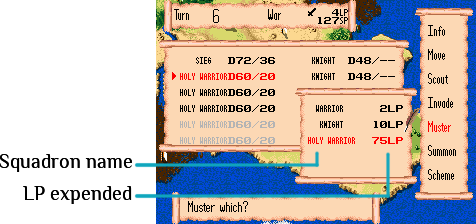
Your Master has no restrictions as to which Squadrons they can find; however, normal Squadrons can only Muster Squadrons of their same type. If only one Squadron is assigned to this task, the Mustered Squadron can only be of a Class equal to or below the original, but if two Squadrons of the same type are assigned to this task, the Mustered Squadron can be one Class above the originals.
This Command can be used in Areas where the Master is located. Please refer to the "Policy" phase Command "Delegate" for more information.
Please refer to the "Policy" phase Command "Options" for more information.
Ends the "War" phase and moves on to the next phase.
This Command is required to know more about an enemy or Neutral Area when invading, or when using the Info Sub-Command "Territory".
This Command will allow you to add Monsters to your Areas by spending SP. The types of Monsters you can Summon depend on the terrain of the Area and the Monster(s) performing the task.
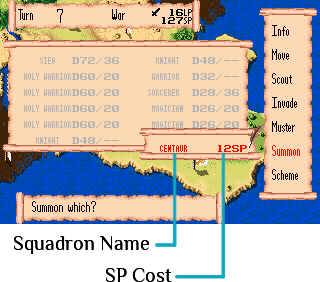
☆ Please refer to the supplementary catalog for the requirements for summoning Monsters.
This Command works in a similar fashion to the Scheme Command of the "Policy" phase. This will allow you to use War-Use Scheme Events, provided you have any.
☆ Please refer to the supplementary catalog for information regarding Schemes.
This Command will allow you to earn EXP needed to Rank-Up. Keep in mind that Balmer cannot use the Train Command.
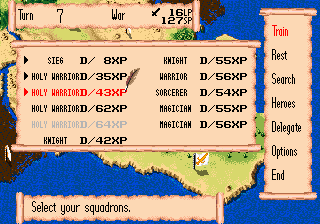
Select the Squadron that will Train, press the A Button to give orders, then press the C Button to confirm. Please note that Summoned Squadrons cannot Train.
Once they Train, Squadrons will not be able to act again until the next Turn.
While Training will increase a Squadron's Rank, it will not increase a Squadron's Class.
This Command will allow you to fully restore HP and MP consumed in combat. Select the Squadrons that will Rest, press the A Button to give orders, then press the C Button to confirm.
Once they Rest, Squadrons will not be able to act again until the next Turn.
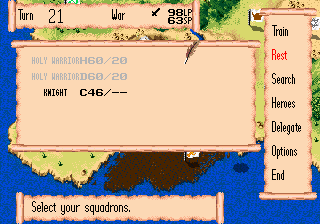
☆ Be aware that Balmer cannot use the Rest Command.
This Command allows you to look for Heroes (see "Heroes" in the supplementary catalog). This Command is only available to Sieg, Vastral, Shelpha, and Ell Moir.
① Select the Squadron that will perform the Search (Mustered Squadrons only), press the A Button to give orders, then press the C Button. You will see a confirmation message. Press the C Button again to Search.
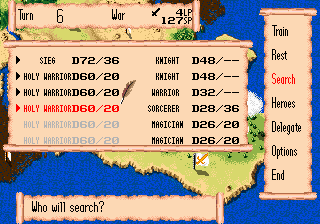

② Once you find a Hero, their name, as well as the LP required to hire them, will be displayed. Press the C Button to hire them, or press the B Button to ignore them.
Lawful (L) Heroes will only join Lawful Masters, while Chaotic (C) Heroes will only join Chaotic Masters. Neutral (N) Heroes will join both.
Once hired, a Hero will take a fixed amount of LP each Turn as a salary. If you do not have enough LP to pay them, they will leave your service. Once a Hero leaves, they cannot be hired again. Furthermore, you cannot hire more than four Heroes at the same time.
This Command becomes available once you have hired a Hero. You will have access to the following Sub-Commands. Select an entry and press the C Button to confirm. (See "Heroes" in the supplementary catalog.)
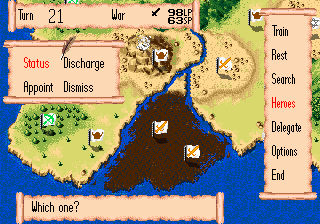
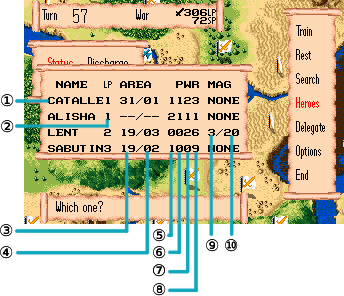
This will display data regarding the Heroes you have hired.
This can only be used from the Area where the Master is located. It allows you to remove a Hero from your forces. If a Hero has been appointed to a specific Area, they must be Dismissed before they can be Discharged.
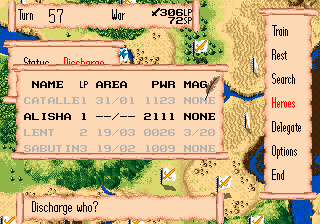
Select the Hero you wish to Discharge and press the C Button to confirm. You will see a confirmation message. Press the C Button again to Discharge the Hero. Be aware that once Discharged, you will not be able to hire the same Hero again.
Give a Hero command of a Squadron.
① Select the Hero you wish to Appoint and press the C Button.
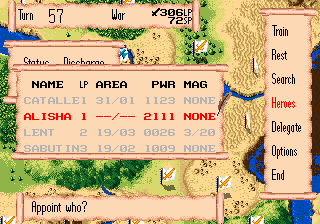
② A list of available Squadrons will be displayed. Select the Squadron the Hero will lead and press the C Button to confirm.
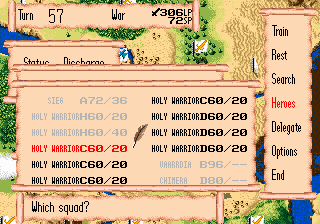
The designated Squadron will not be able to act again until the next Turn.
When led by a Hero, a Squadron receives additional stats from the Hero. The symbol "H" will be displayed on the Squadron's Status to indicate this fact.
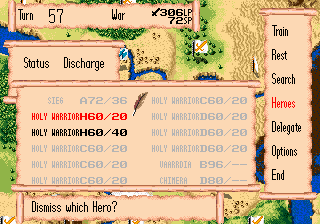
This will remove a Hero from command of a Squadron. Select the Hero you wish to Dismiss and press the C Button to confirm.
These are the Commands displayed on the Tactical Screen when you enter combat. Select the Command you wish to execute and press the C Button to confirm.
Do nothing for this combat Turn.
Move the Squadron.
Move up or down once. If there is another Squadron in the target location, they will swap positions. Once you have chosen whether to move up or down, press the C Button to confirm.
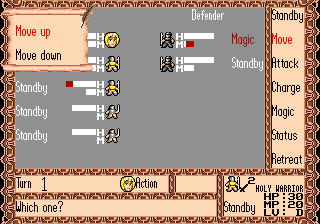
Select one of the highlighted tiles on the Tactical Map and press the C Button to confirm and move your Squadron.
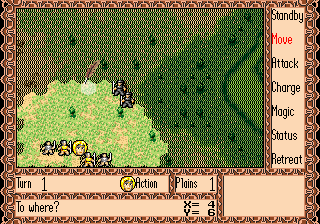
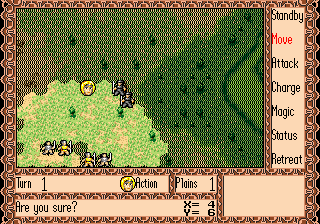
This Command allows you to attack the enemy. There are 4 different types of attack, depending on the Squadron. Select your attack type from the list and press the C Button to confirm.
Pressing the A Button at this time will display the hit rate of the attack. Pressing Left and Right on the D-Pad will change between the Attacker and Defender, while pressing Up and Down will change between Squadrons.
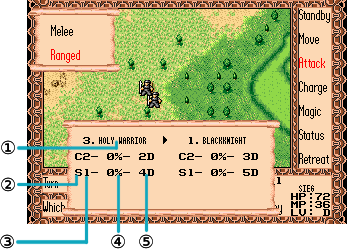
Attack the enemy directly. If the two Squadrons are a player-controlled Master or Hero, and the Battle Screen is set to On in the Options, you will move on to the Battle Screen.
Close-range attacks can only target enemy Squadrons in front of them.
Close-range attacks can target any neighboring enemy Squadron.
Select a target on the Tactical Map and press the C Button.
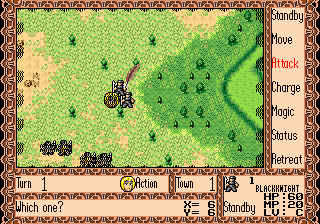
Attack the enemy from a distance.
Select an enemy Squadron above, below, or directly in front, then press the C Button to Shoot.
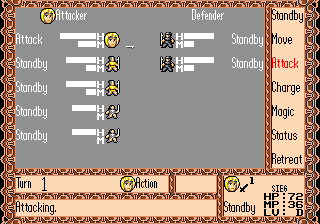
Select an enemy Squadron in range, then press the C Button to Shoot.
Be aware that you cannot do this when an enemy is located on a neighboring tile.
You can check a Squadron's range with the "Status" Command.
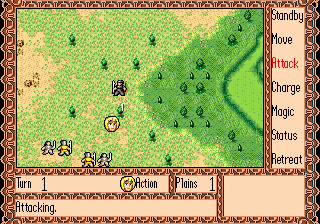
Emit fire, attacking enemies in the Squadron's surroundings. Only certain Monsters possess this attack type.
This attack will inflict damage to the enemy Squadrons directly in front, above and below, as well as allied Squadrons above and below.
This attack will inflict damage to any neighboring Squadrons.
Consume HP to unleash a special breath. Only certain Monsters possess this attack type.
Press the C Button to attack the Squadron directly in front, as well as those above and below.
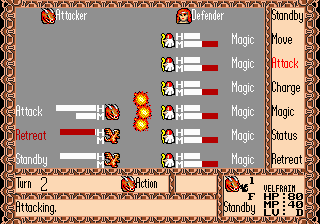
Select one of the neighboring tiles and press the C Button to attack the target Squadron and its neighboring Squadrons.
Keep in mind that if there are allied Squadrons in the affected area, they will be damaged as well.
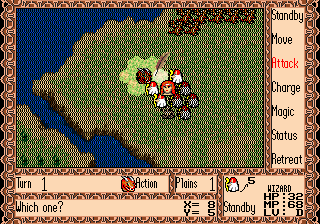
Attack at close range until one of the Squadrons has been defeated. If both Squadrons are a player-controlled Master or Hero, and the Battle Screen is set to On in the Options, you will move on to the Battle Screen.
You can only Charge the enemy Squadron directly in front. You will see a confirmation message. Press the C Button to confirm.
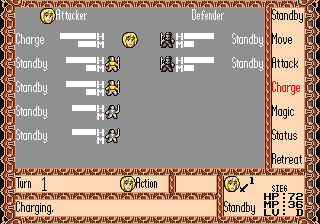
You can Charge a neighboring enemy Squadron. Select a target on the Tactical Map and press the C Button to confirm.
You will see a confirmation message. Press the C Button again to Charge.
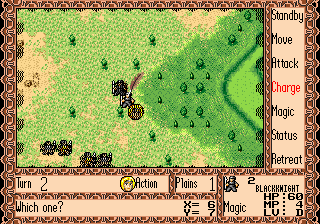
Cast a Magic Spell. Only Squadrons with MP can use this Command.
Be aware that Squadrons cannot use Magic in the same Turn that they Move.

There are 6 types of Magic, depending on the Squadron. Each type has its own Magic Level, which affects which Spells can be used.
Select the Magic Type you wish to use and press the C Button to display a list of Spells. Select a Spell and press the C Button to confirm.
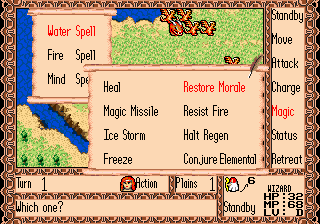
While the Magic Types are displayed, press the A Button to see the Level and the success rate of the Spells.
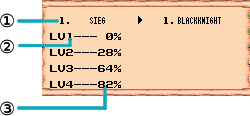
Press Up or Down on the D-Pad to switch to the enemy Squadron.
☆ Please refer to the supplementary catalog for information regarding Magic Spells.
This will allow you to view a Squadron's information.
You can only check your own Squadron's information.
Move the quill pen over a Squadron on the Tactical Map and press the C Button to view information on that Squadron.
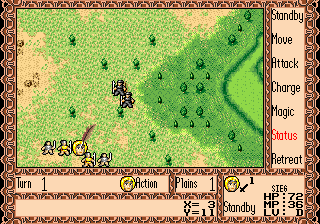
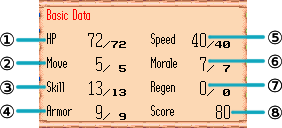
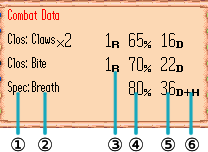
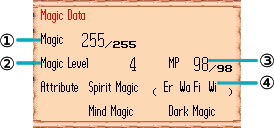
There are four different types of information you can check: Basic Data, Combat Data, Magic Data, and Special Traits. Basic Data is the default screen; press Up and Down on the D-Pad to change to the other screens.
This will list the Squadron's special traits.
This Command will allow the Squadron to retreat to their original Area, or a neighboring Area under your control. Select the Squadron that will Retreat and press the C Button to confirm.
Be aware that a Squadron will not Retreat if there are no available Areas, or if its Morale is too high.
Cartridges are very delicate. Please handle them with proper care.